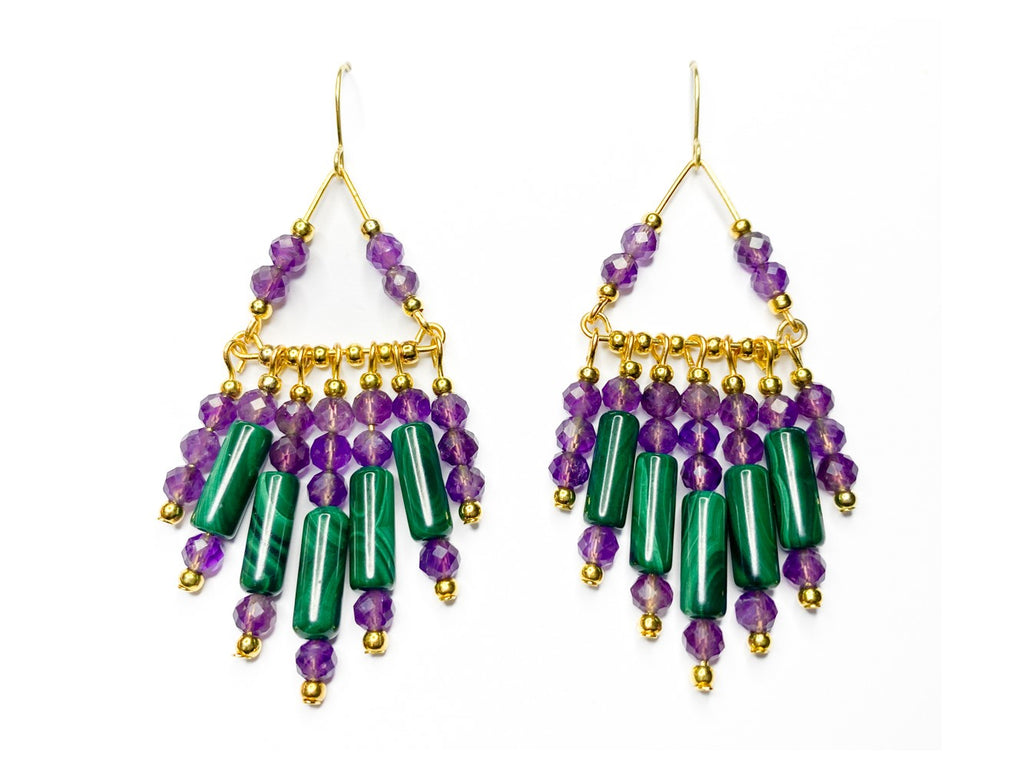
Malachite & Amethyst Chandelier Earrings Tutorial

Create these colorful chandelier earrings from head pins, beads, and creativity!
So much more than the sum of their parts, these earrings come together into a luxe, swingy, colorful design that you'll want to wear every day! The best part? Once you get the hang of this design, there are endless possibilities for customization. (Try them with aquamarine in place of amethyst, and get a whole new vibe! Or sub the malachite tubes with lapis... you get the picture!)
Supplies For this Project
2-inch Headpins (18 total - 9 per earring)
Malachite Smooth Tube Beads (10 total - 5 per earring)
Amethyst Microfaceted 4mm Round Beads (48 total - 24 per earring)
Crimp Beads #2 (48 total - 24 per earring)
Ear Wires (1 pair)
Tools
Round-nose pliersChain-nose pliers
Cutters

Step 1: Put the beads on the head pins
- Start out with 7 headpins (these will become your dangly chandelier pieces).
- Add one crimp bead (they are decorative in this case —no need to squish them) to the bottom of each headpin.
- Then add the rest of your beads as pictured, and add one more crimp bead at the top of each stack. Line your pins up to make sure you've created a symmetrical pattern, with the longest stack of beads in the center.
Step 2: Make loops and assemble the bottom part of the earring

- Using your cutters and round-nose pliers, trim and make equal-sized loops at the top of each headpin.
- Clip the head off of an additional headpin, and make a loop at one end. Add a crimp bead to the head pin, then add each of the the chandelier pieces that include malachite tubes, putting single crimp bead between each one. (Do not add the 2 outer chandelier pieces that are just amethyst; set those aside for now.)
- Trim and loop the other end of the headpin that you've added your chandelier parts to.
Step 3: Create the top part of the earring
- Clip the head off a new headpin and bend it in half at a 45 degree angle (approximate is ok! You can adjust it later as needed).

- On the left side of the pin, add a crimper, two microfaceted rounds, and another crimper on one side and make a loop that attaches to the loop on the left side of the bottom part.
- Repeat this process on the right side of the bent pin, attaching its loop to the right side of the bottom pin. You may need to adjust the angle of your bend in order to get the loops to align.
- Add your outer pieces of the chandelier (the ones with 3 microfaceted beads and no tubes). Add one on each side, attaching it to the left and right side loops of the lower part. (See image at right.)
- Make any adjustments needed so that the bottom part hangs freely.
- Now, add your headpins to the top part, and you're done!
With your newly acquired skills and a touch of creativity, you've crafted a stunning pair of chandelier earrings! These unique accessories will add a touch of elegance and sparkle to any outfit. Remember, the beauty of this design lies in its versatility. Don't hesitate to experiment with different gemstones, colors, and patterns to create personalized earrings that reflect your unique style. Happy beading!

Comments on this post (3)
Great tutorial. Keep em coming!
— Susan
wOw! thank you for sharing! this is great!
— Gen
Thank you for great guides.
— Carolyn Goode